A350
Color Screen Fingerprint and RFID Time Attendance Terminal
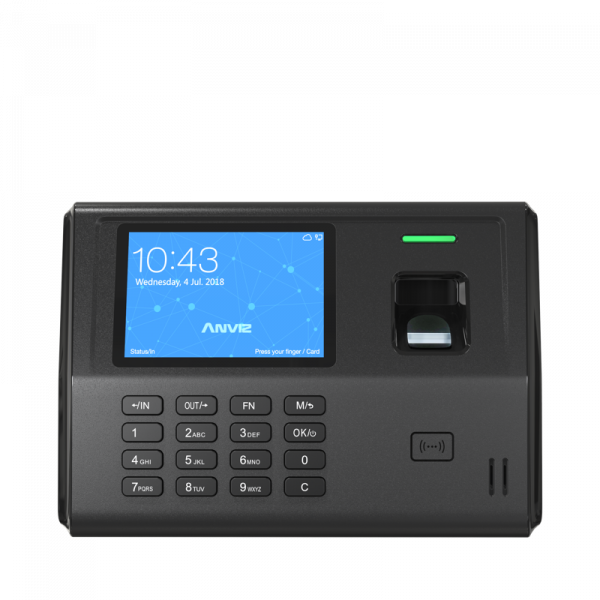
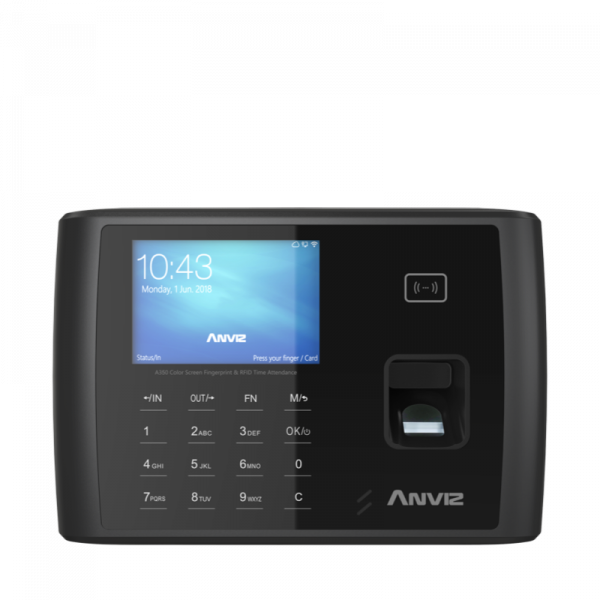
W1 Pro is the new generation fingerprint time attendance terminal features based on Linux platform. W1 houses 2.8-inch color LCD with rich colors and visibility that displays intuitive GUI that is easy to understand and self-explanatory. Full capacitive touch keypads along with touch optical fingerprint sensor will offer convenient operation experience and improve the practicality of the wet and dry fingerprint.
W series equips a linux based 1GHZ cpu which ensures a less than 0.5S comparison time.
2.8” Color Screen
WiFi function
Low Power Consumption
Linux 1GHz CPU
New IR Fingerprint Sensor
Touch Keypad
RFID Card
W1 Pro provides a long life battery and a WiFi communication module which ensures a quick and convinient installation.
The new generation linux based 1Ghz CPU takes W1 Pro to a higher level, increased 40% speed compared with W1.
Access to your terminal anytime, anywhere
For cloud based management, you don’t need to invest any IT equipment and IT specialist in your office which realize the cost effective application.
You can access to your system by the mobile device at anytime, and check all the time and attendance records remotely.
All transmissions will be based on aes256 and HTTPS protocol. In any unpredictable situation, all data can be backed up and recovered on the cloud.
The W1 Pro offers aiming flexibility and can be portable.
| Item | w1 Pro | |
|---|---|---|
| Capacity | ||
| Fingerprint Capacity | 3,000 | |
| Card Capacity | 3,000 | |
| Record Capacity | 100,000 | |
| I/O | ||
| TCP/IP | Support | |
| MiniUSB | Support | |
| Bluetooth | Optional | |
| I/O | Door contact and swith | |
| Temper Alarm | Support | |
| Feature | ||
| Identification Mode | Fingerprint, Password, Card | |
| Identification Speed | <0.5 Sec | |
| Card Reading Distance | 1~5cm(125KHz),13.56MHz>2cm for standard CR80 card | |
| Image Display | Support | |
| Group, Time Zone | 16 groups, 32 time zones | |
| Work Code | 6 Digit | |
| Short Message | 50 | |
| Record auto inquiry | Support | |
| Voice Prompt | Buzzer | |
| Clock Bell | Support | |
| Software | Anviz CrossChex | |
| Cloud Access | Support | |
| Hardware | ||
| CPU | 1GHZ Processor | |
| Sensor | Touch active sensor | |
| Scanning Area | 22*18mm | |
| RFID Card | Standard EM, Optional Mifare | |
| Display | 2.8" TFT LCD Display | |
| Button | Touch button | |
| LED indicator | Support | |
| Dimensions (WxHxD) | 130x140x30mm(5.12x5.51x1.18") | |
| Working Temperature | -30°C to 60°C | |
| Humidity | 20% to 90% | |
| Power input | DC 12V | |


1) Normal Update
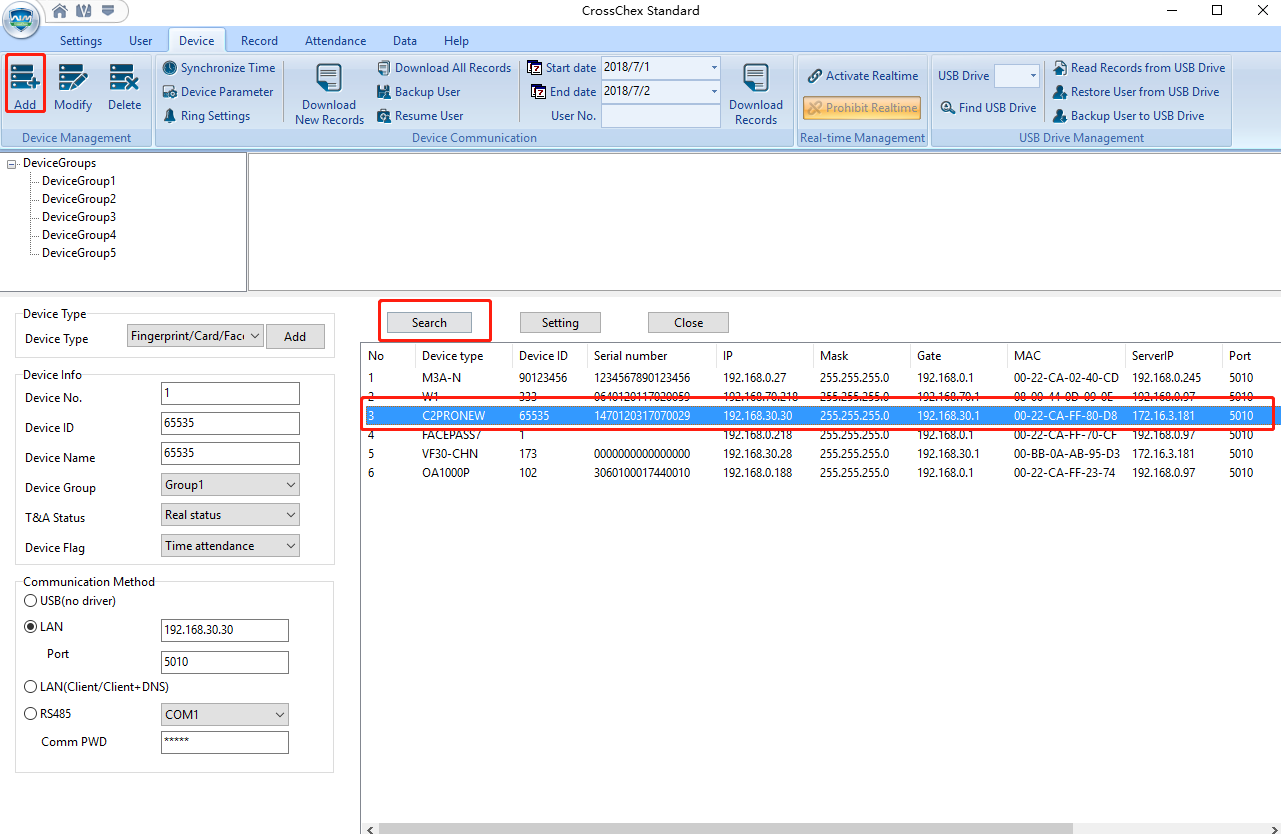
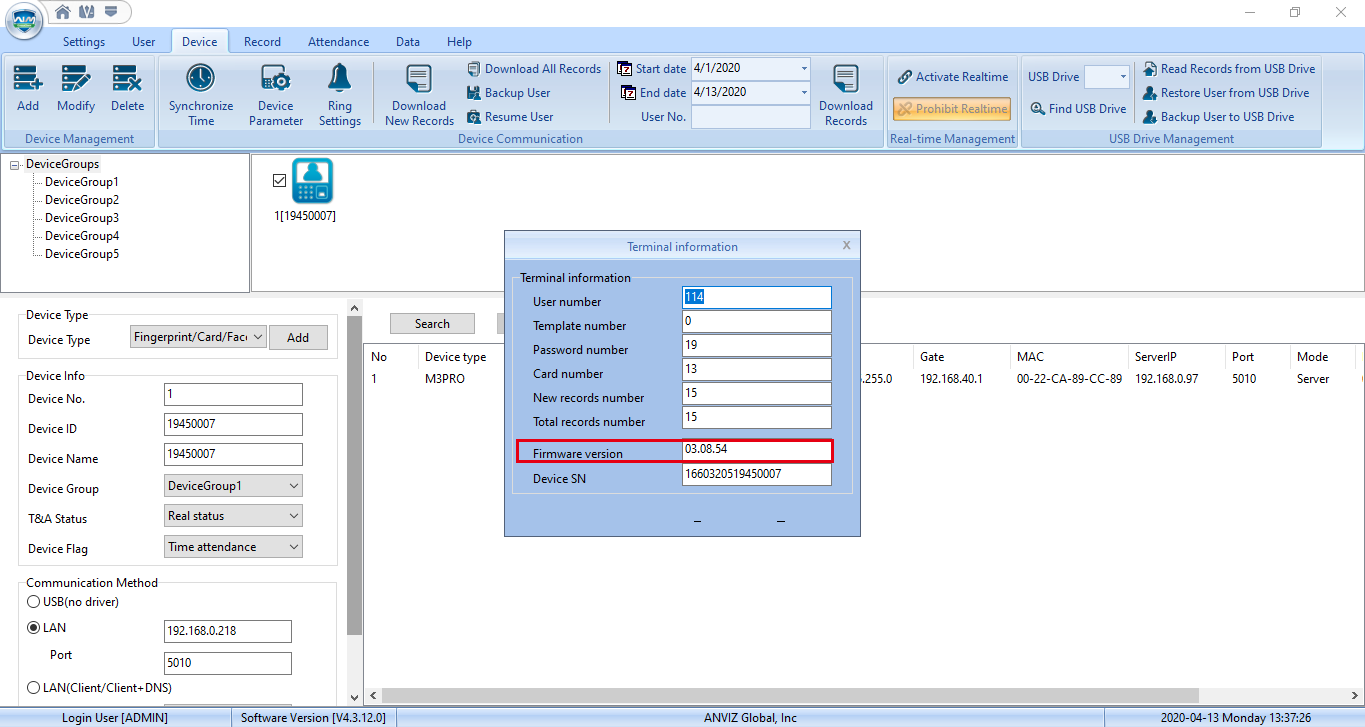
>> Step 1: Connect Anviz device to PC via TCP/ IP or Wi-Fi. (How to connect to CrossChex) |
 |


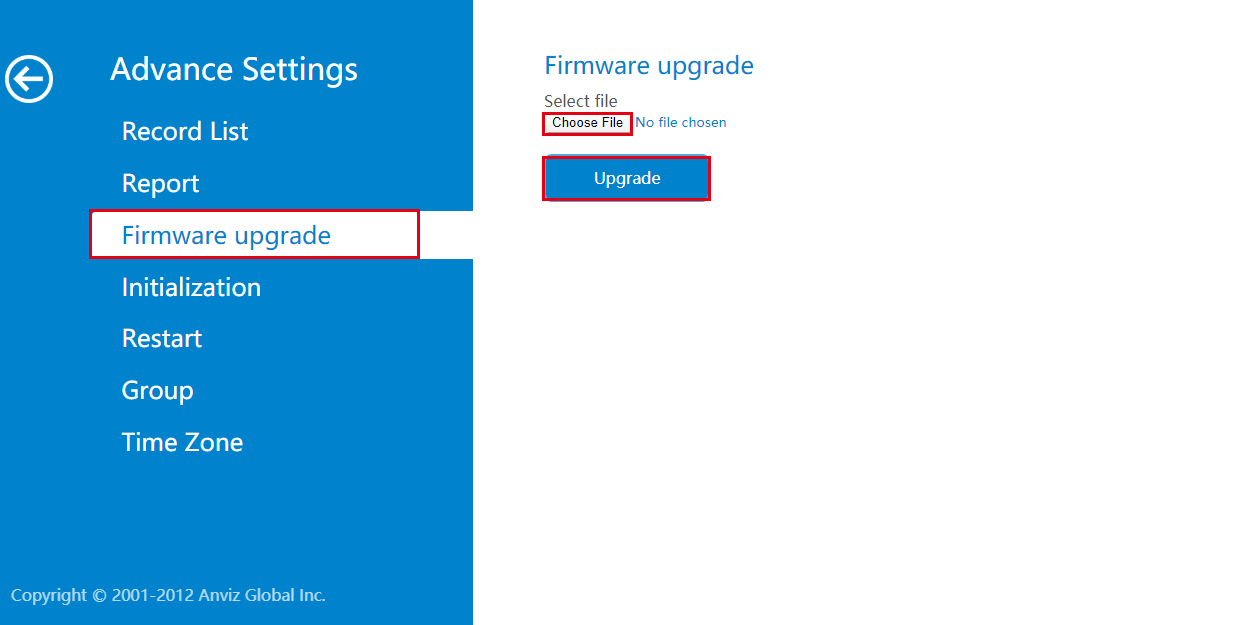


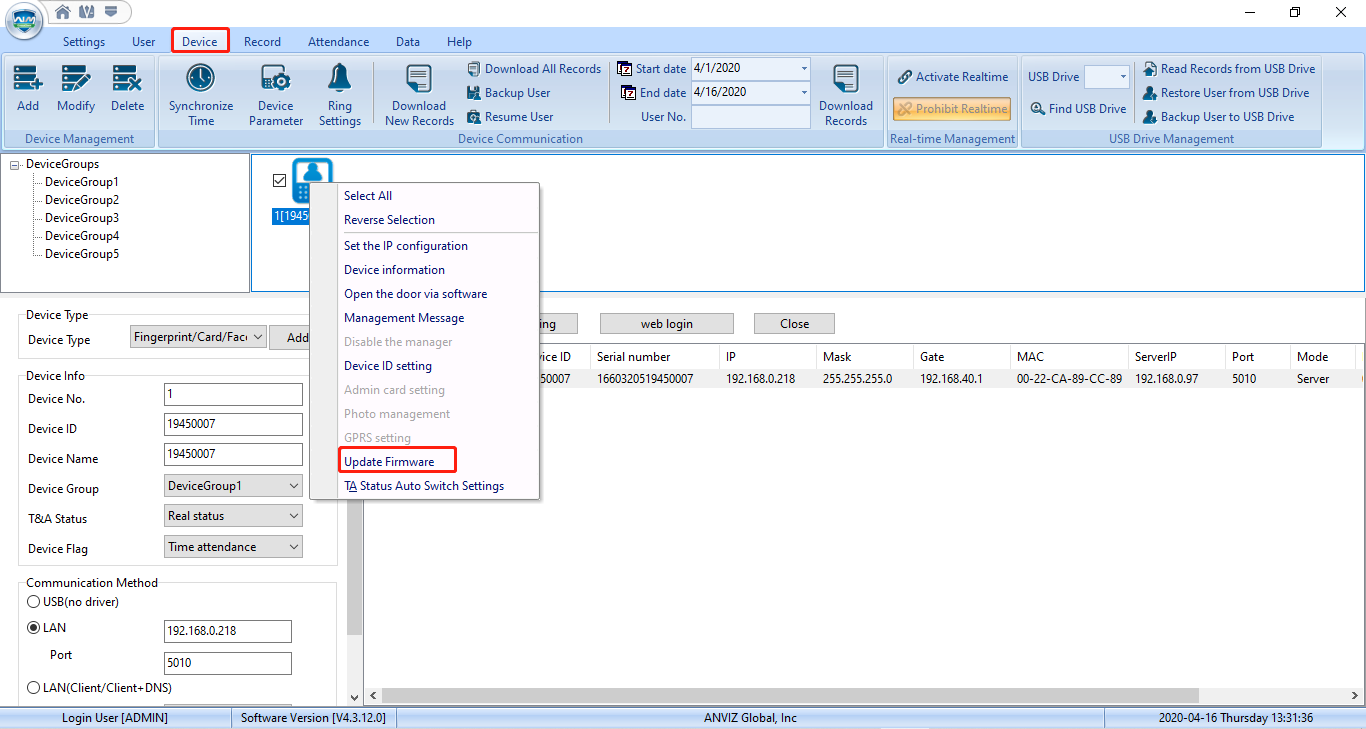


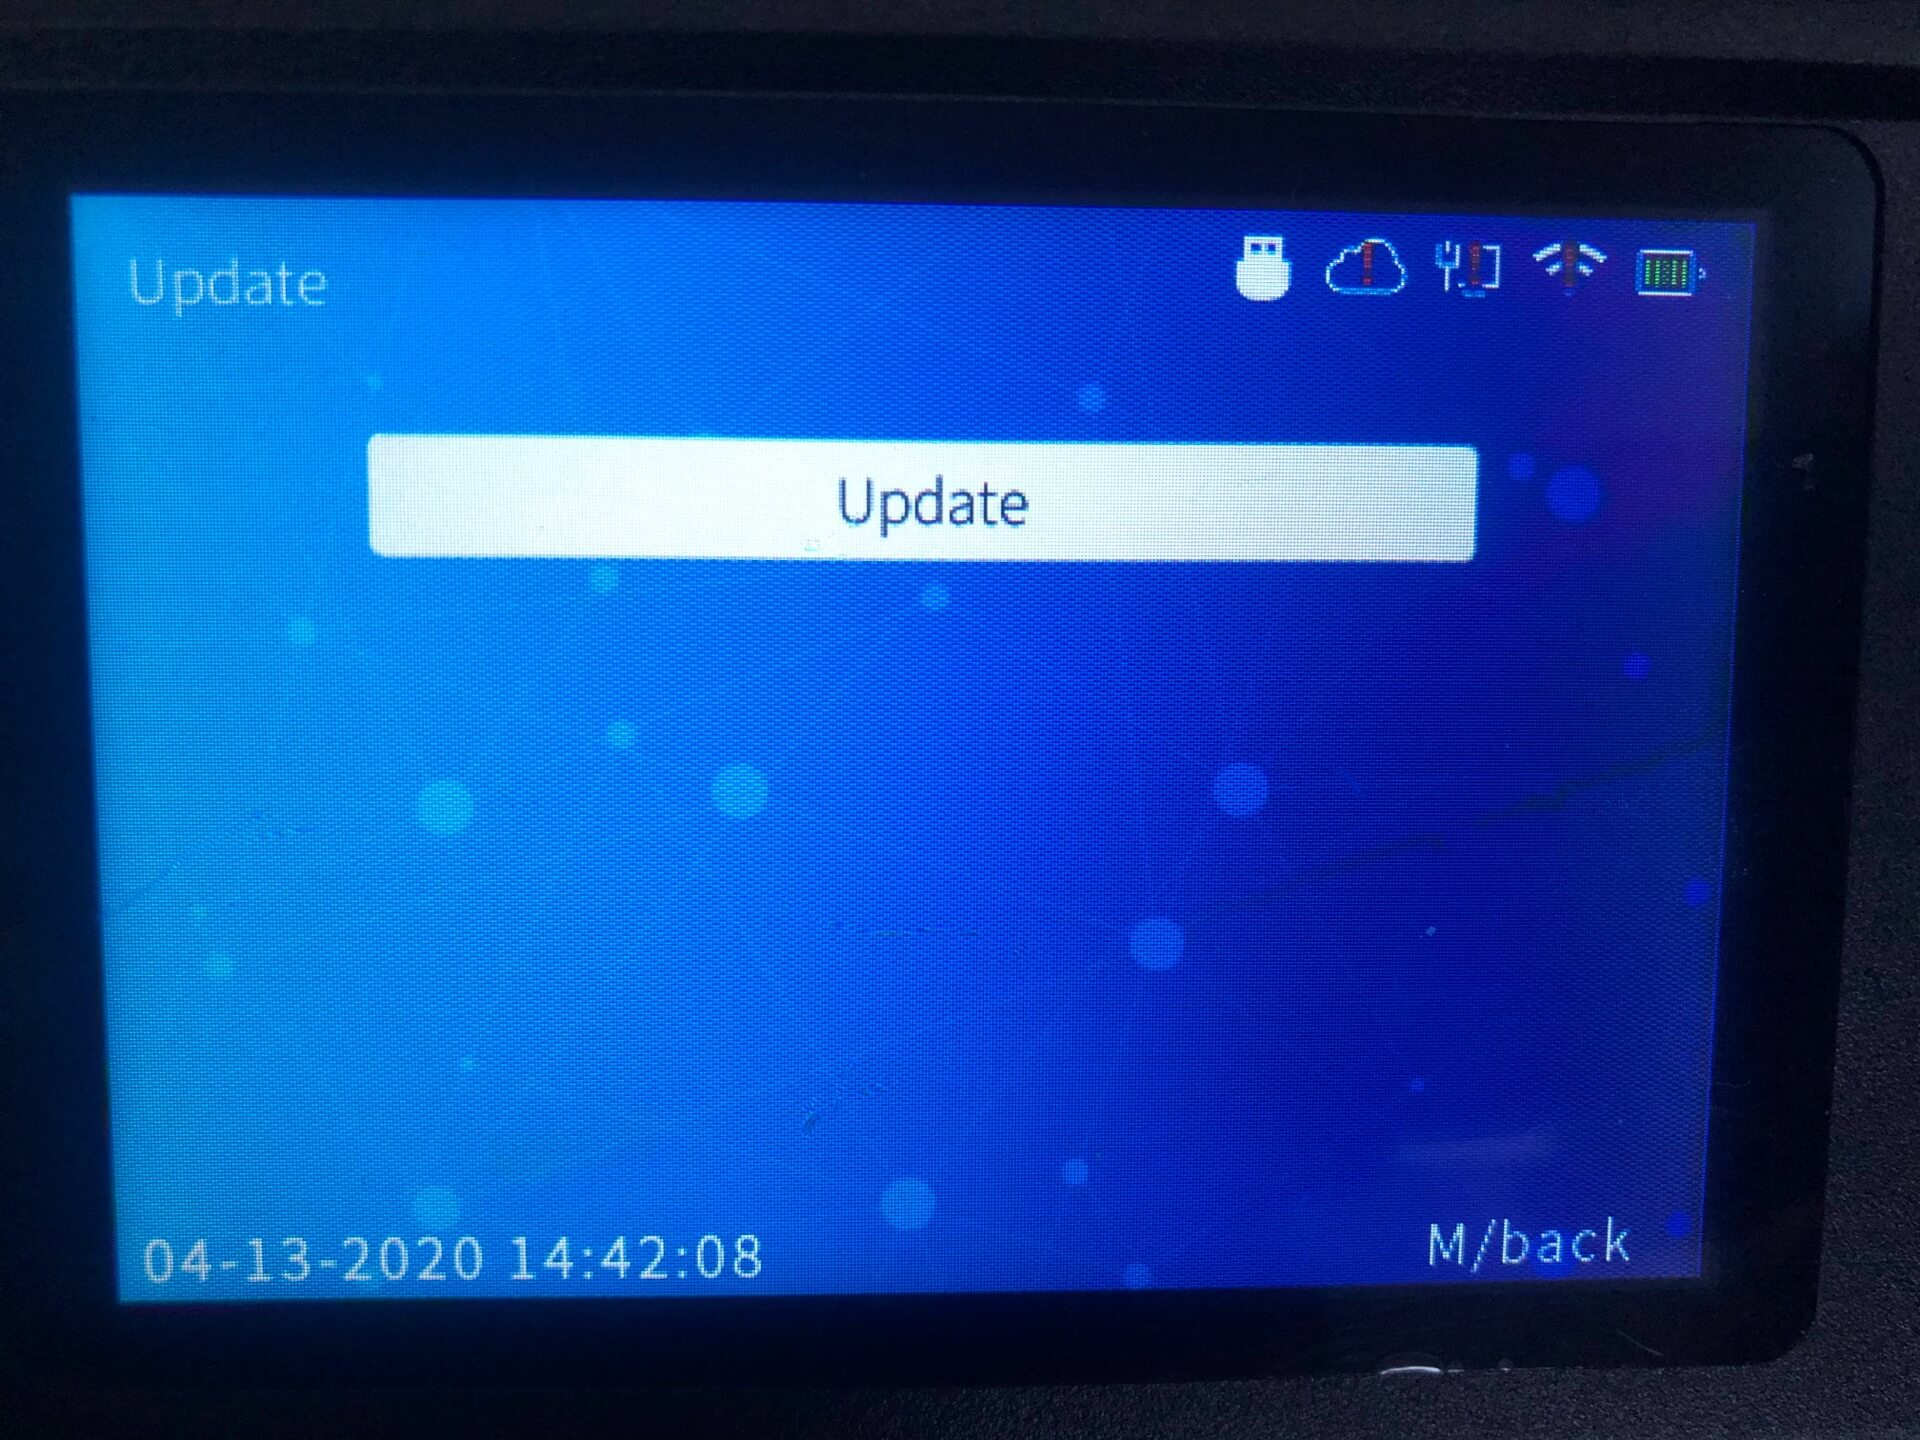
>> Step 1: Plug a flash drive (with an update firmware file) into the Anviz Device.
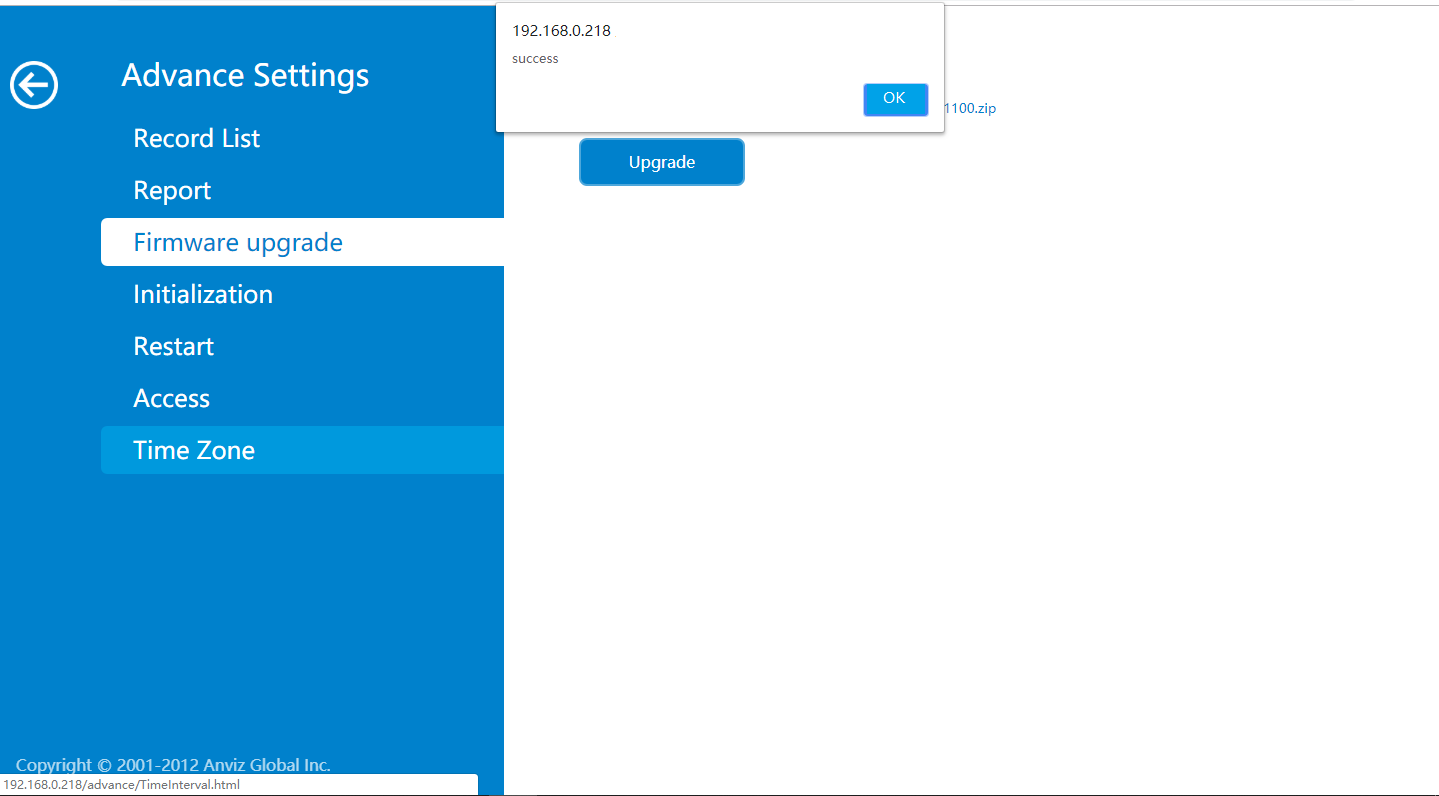
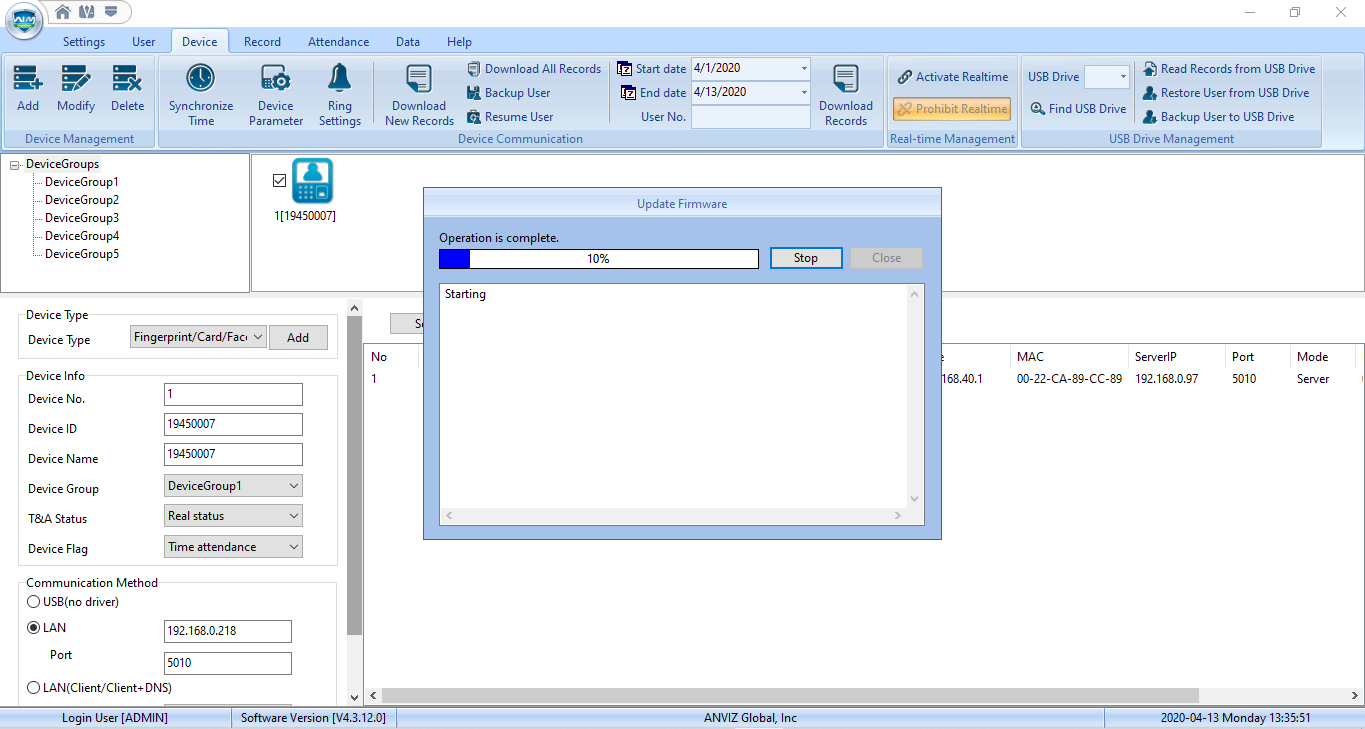
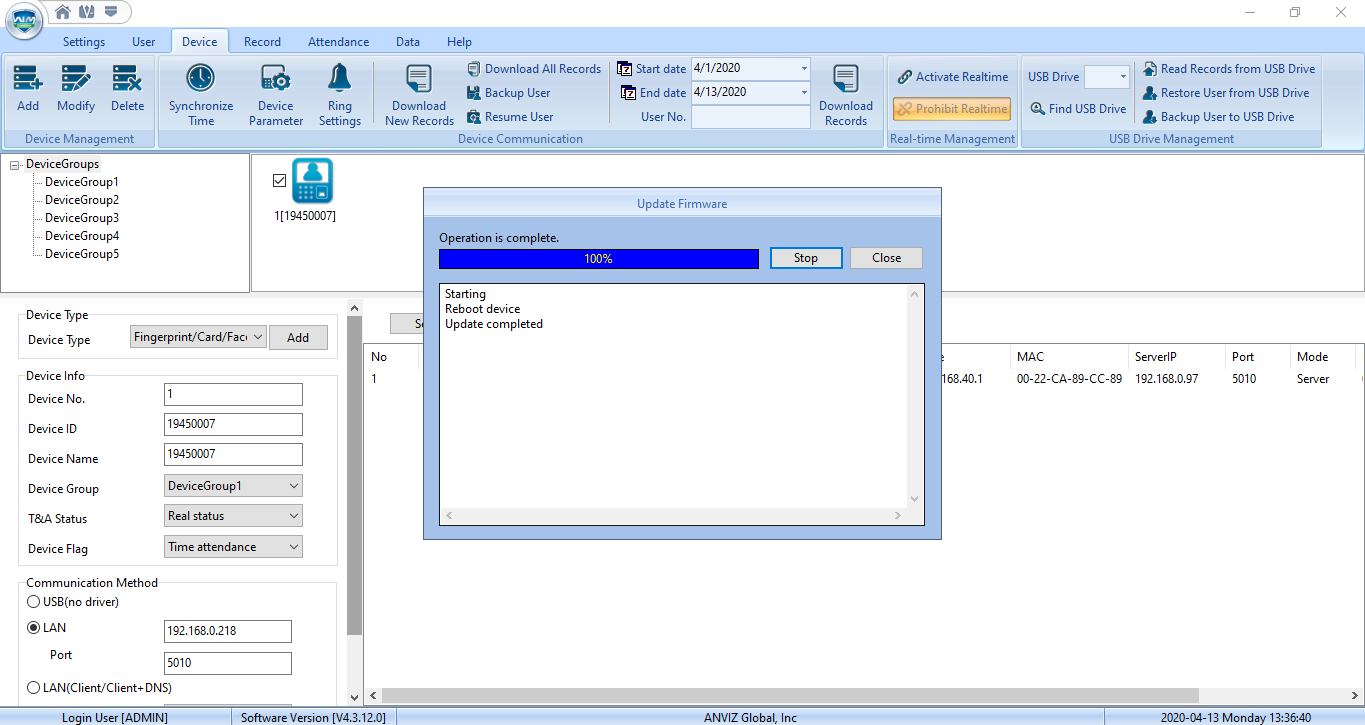
>> Step 3. Click 'Update' -> then 'OK'.
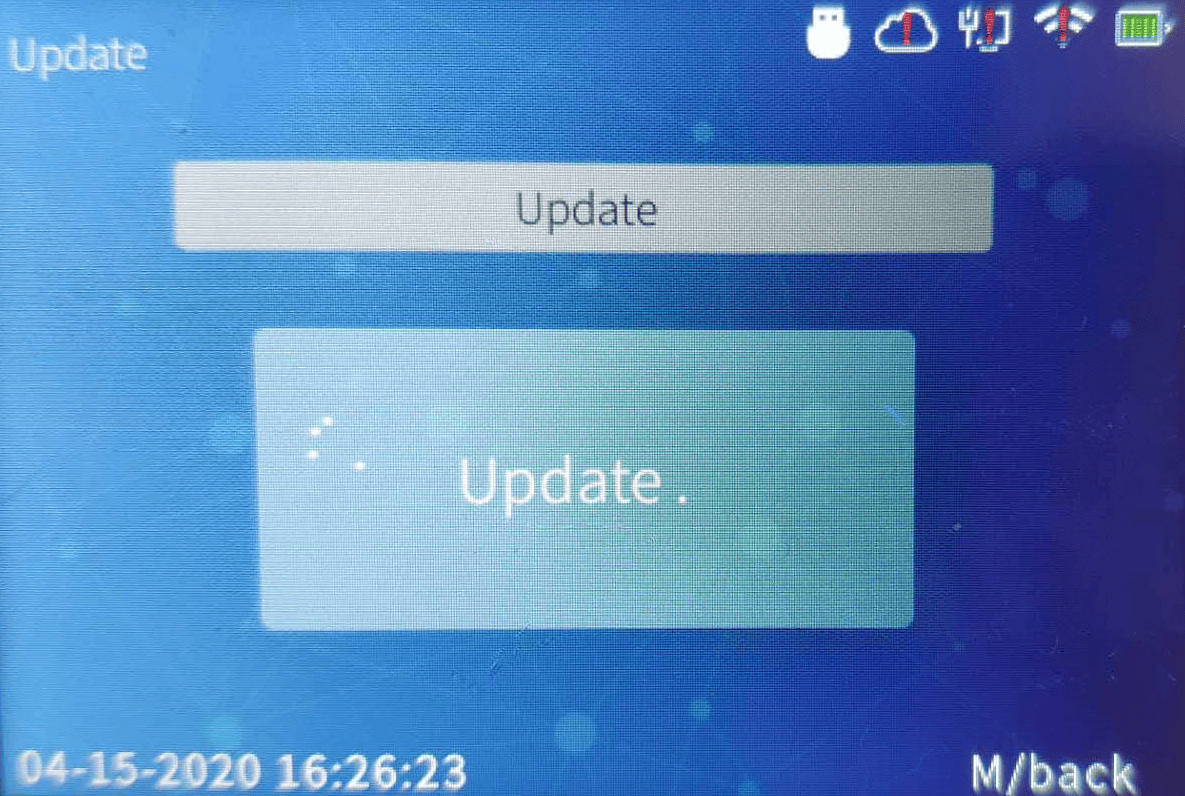
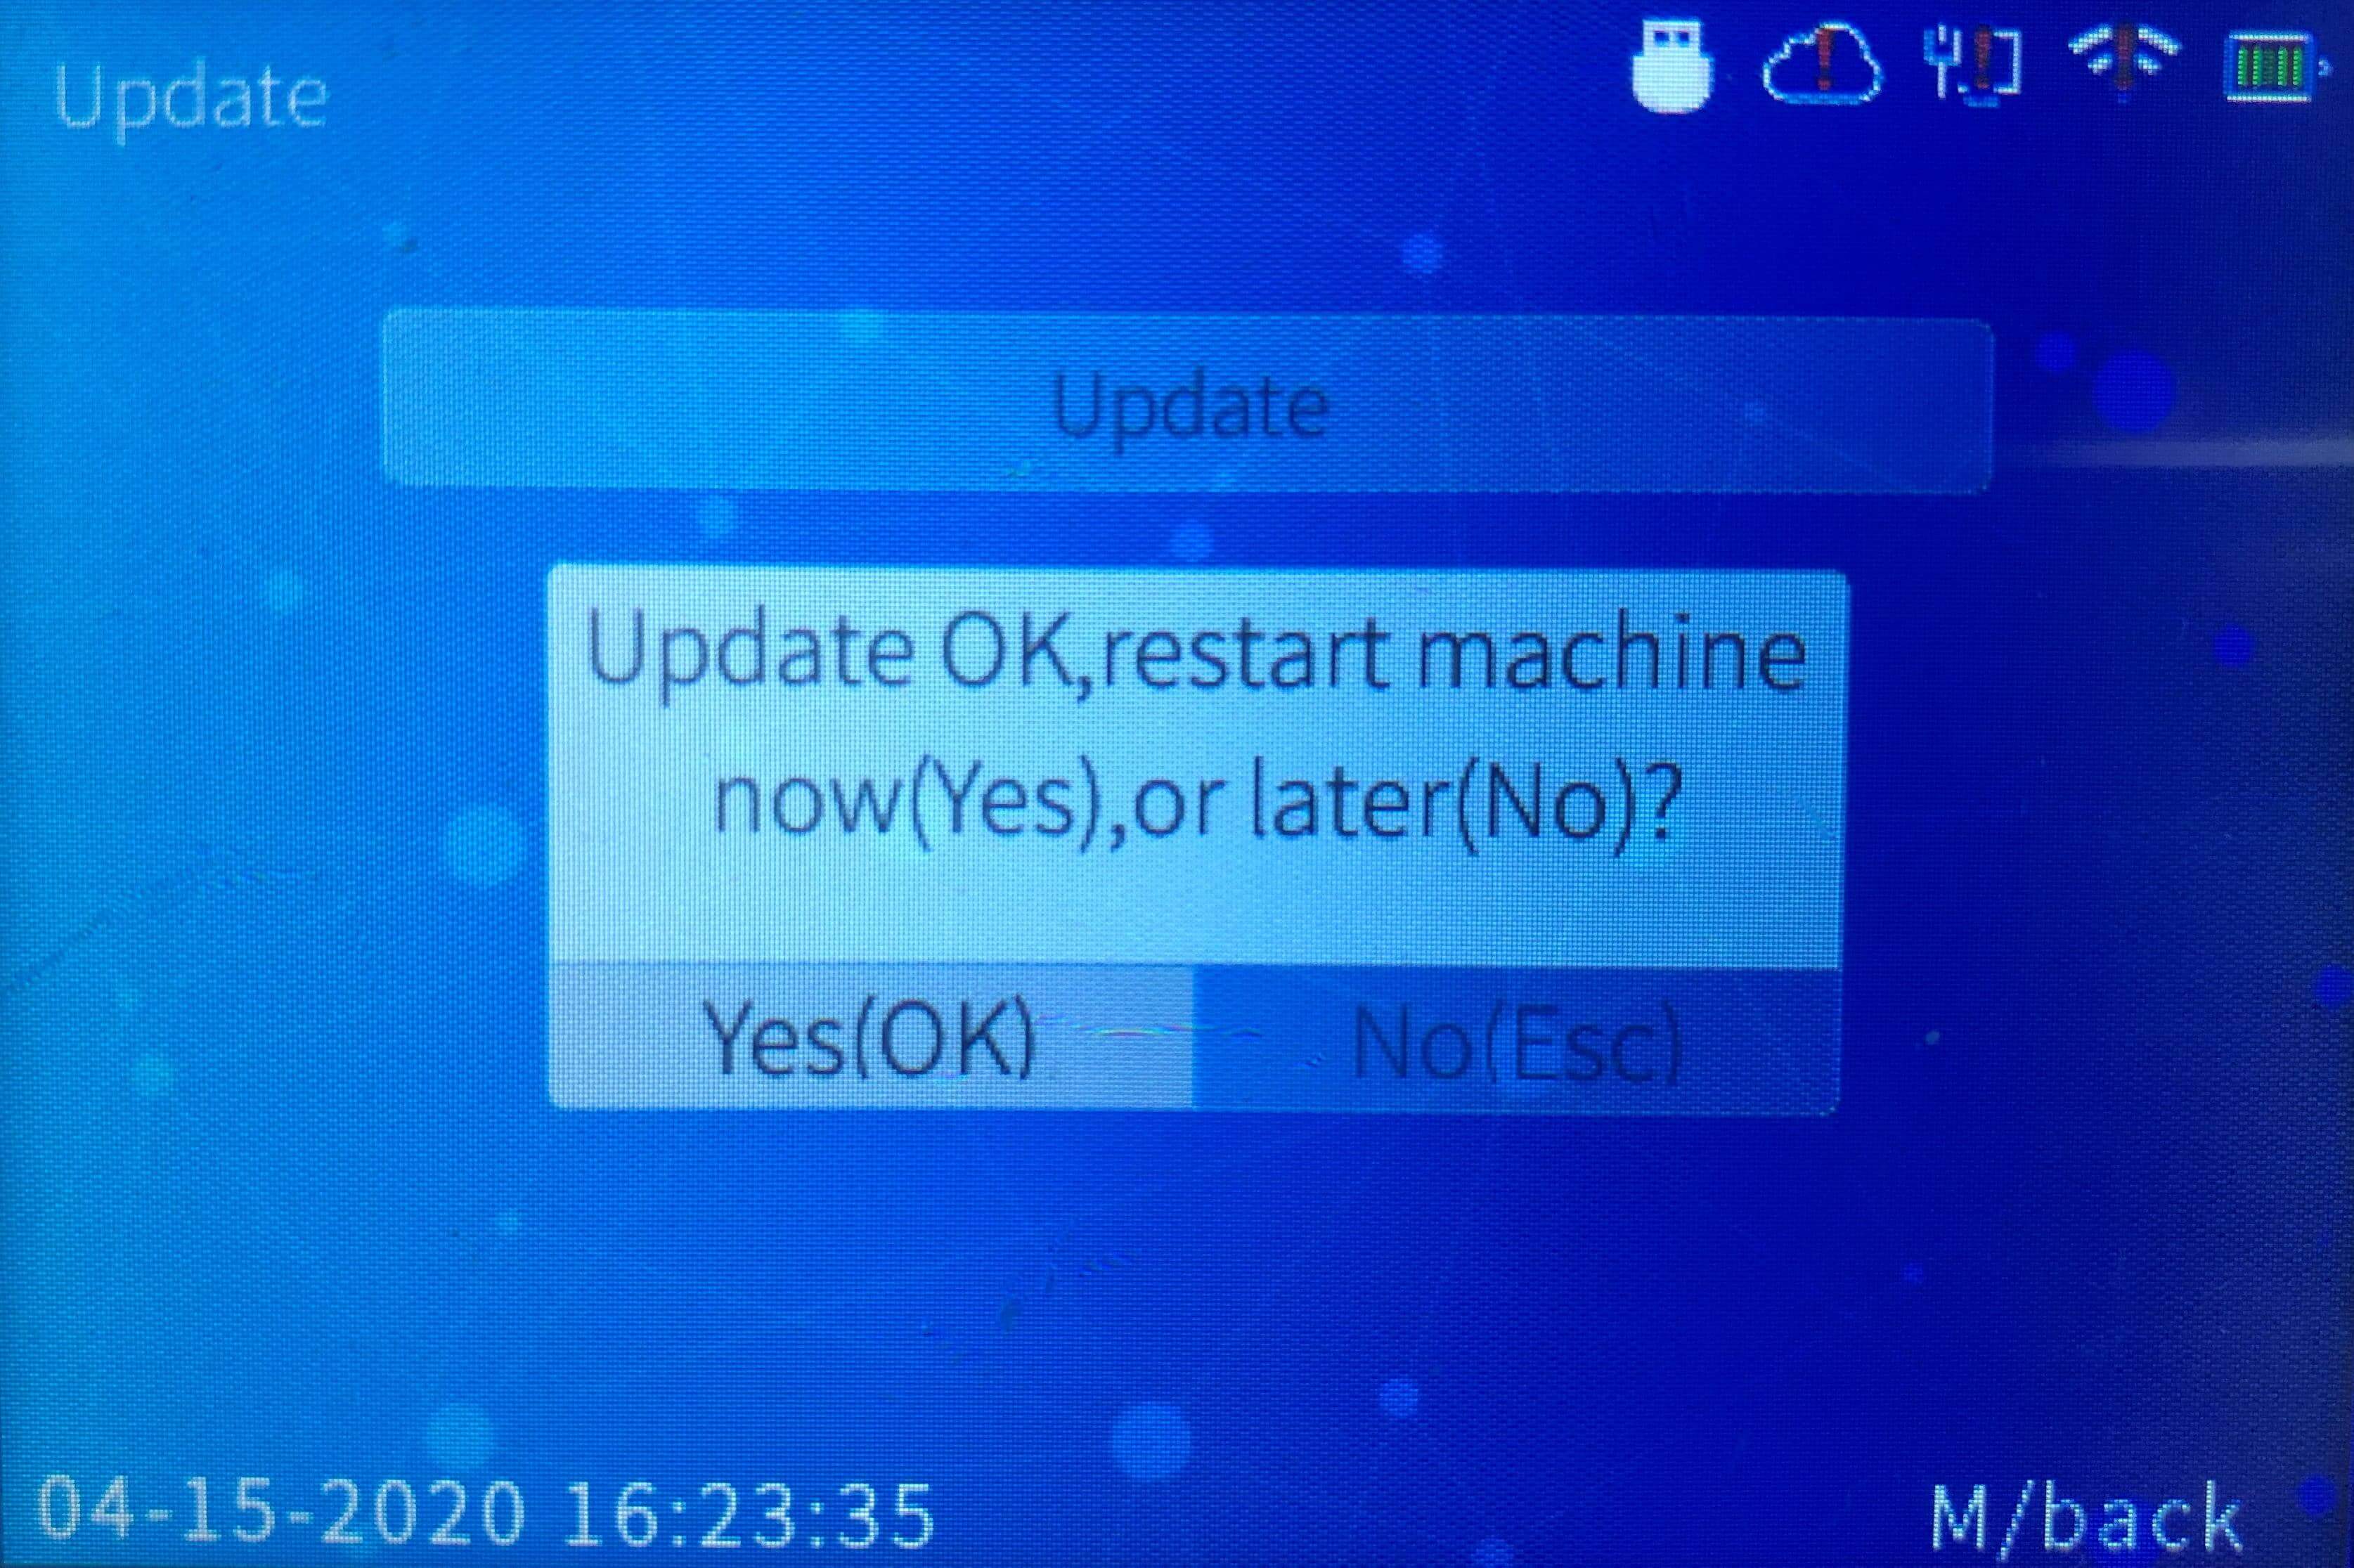
>> Step 4. It will ask you to restart, press 'Yes(OK)' to restart once to complete the update.

>> Done
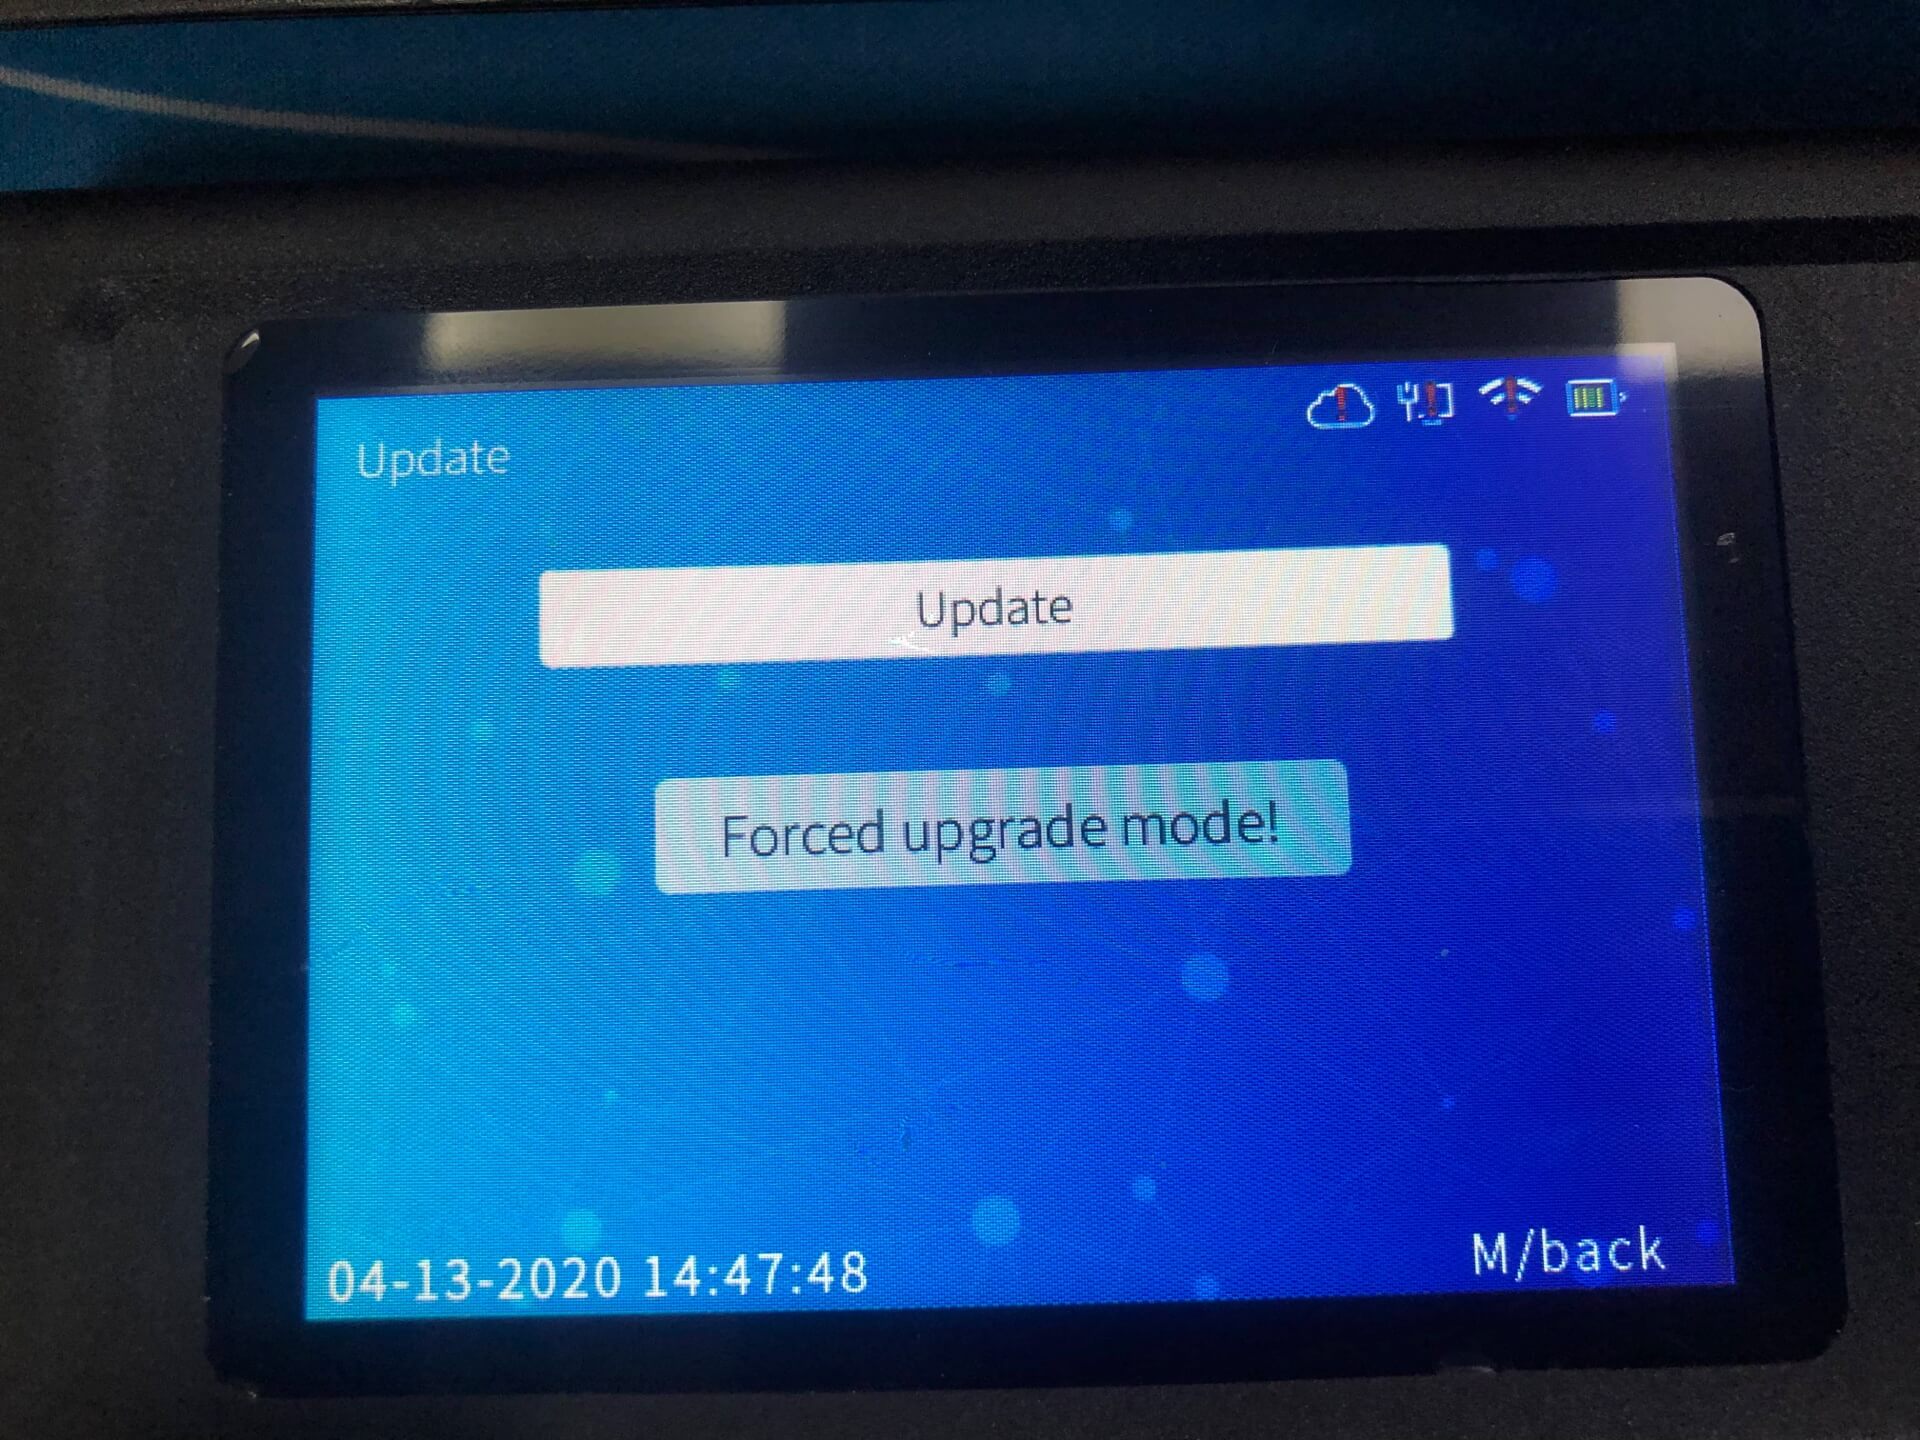
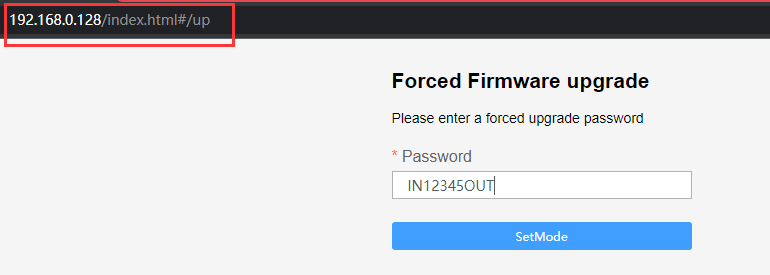
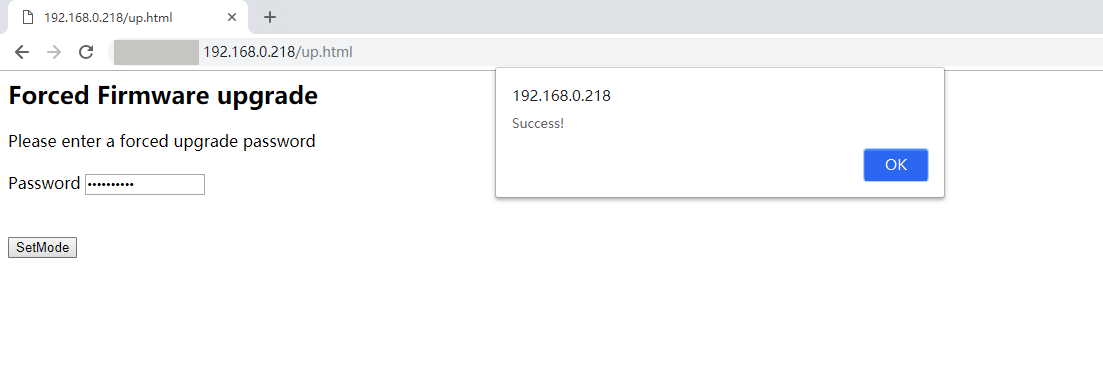
(****** Sometimes devices are not allowed to be updated, this is because of device protection policy. You can use force update mode when this situation occurs. *****)